Saturday, July 25, 2009

Flowing Brook

Yippee! I can't believe I finished my second painting in two hours flat. No exaggerations, I swear.... I worked on it like a woman possessed, and so enjoyed the experience!

This is my rendition of the English countryside in Cotswold, UK. It has been inspired by the photographs of a very dear friend who visited the area a few years back.


So what do your think of this one?

Friday, July 24, 2009

The Lotus Ganesha

Here's introducing you all to The Lotus Ganesha, my very first acrylic on paper. As I said in my last post, I carried around a sketch of this for months, and am so relieved to have finally done some justice to it. Reactions, comments, suggestions?


Though I do have a confession to make. I slipped on my target of 'one painting in a week' with my very first painting! tch, tch... :(


From the sketching stage right upto the final layers of paint, it took me two whole weeks to finish The Lotus Ganesha. Somehow I got so entagled in household chores, kids' homework, weekend travel and so on, that the poor painting had to take a backseat.


But the good news is, it is finally complete. And I am already working on the next one!

Thursday, July 16, 2009

Addicted To Acrylics, Again!

Seems like my ceramic paints phase is over for a bit. I’m back with my old love, the box of acrylic paints and am enjoying using them on paper.

What I love most about them are the vibrant colours, and the umpteen luscious shades one can come up with. Yes, some of the mix-n-match shades look downright yummy and edible!

I have also promised myself to take my acrylic-on-paper phase more seriously. My target is one painting per week. Lets see if I can keep up the resolve!

Am currently working on the first one, and hope to share it soon. This sketch has been lying with me for perhaps six months now…. am so glad to finally see it getting done.


The monsoons sure inspire my creative juices! Hope you all are having an inspired phase too.

Wednesday, July 8, 2009

Fun Kiddy Projects

We did some fun projects last month, me and the kids.

Started with some finger-painting…


Then moved on to ladyfinger printing!


Don’t these turtles give the Olive Ridley’s some serious competition? :)


Made an octopus out of a paper plate and cut-up straws…

And used the remaining part of the paper plate to create an African-style neckpiece! That, incidentally, is my three year old daughter posing so gleefully with the neckpiece.


Finally we did some palm prints to make the scorching sun (as if we needed any more of its heat…. Phew!!)
What did you all do to keep the kids busy during their summer vacations?

Wednesday, June 24, 2009

Upcycling Glass Jar

Today I am sharing the technique I used to create the toothbrush holder written about in my last post.
  

1. Draw out the design you want on a piece of paper. Make sure before drawing that you fix the width of your drawing as per the size of the bottle you want to paint. We don’t want any pattern overlaps now!

2. Affix this paper inside the bottle using tape so that when you paint on the outside, the design doesn’t move.

3. Now paint directly or draw out outlines using a non-permanent marker. 4. Fill in all the details of your design, including a background. Tip: If you want to add a background to your creation, then ensure you start the painting process with that. It’ll be easier to paint on the design details over the background color rather than make your background fit in with the lines of your design. The second alternative if you are using a wide-mouth jar is to paint in the background color from the inside of the bottle. 5. Enjoy your creation! :)

P.S. - Remember the bottle-vases I painted a few months back? You can catch them in action here.

Monday, June 22, 2009

Painted Toothbrush Holder

Have just finished painting on a jam bottle with my ceramic paints. And voila! It has metamorphosed into a toothbrush holder for the kids’ bathroom.

Froggy with his red umbrella and the giant mushrooms all add a dash of fun to the morning chore of brushing, making it that much easier for the kids and us.


This time I tried a more complicated design than my previous attempts at painting on glass bottles. And learnt some invaluable lessons.

I used Fevicryl’s ceramic paint pack which comes with basic colors. The paints are so quick-drying that you cannot work with them under a fan. Mixing colors is also pretty tough since you have to constantly keep thinning them with water else they dry up. And all that water wrecks color consistency.

So while this activity requires immense patience and a fair amount of careful planning before you start, the end result more than makes up for it. When my kids saw their new brush holder, they made friends with Froggy instantly and loved the mushrooms. :)


I’ll share the technique I used to paint this bottle in my next post.

Thursday, June 11, 2009

Making A Paper Parasol

Try these easy-to-make paper parasols at home for your kiddy parties. They do not have wooden spines like the commercially available ones. But if you use stiff paper, you can get the right look anyway.

The steps are:

1. Cut a circle of 1.5"-2"(inches) diameter out of stiff paper. I used both card paper from a pamphlet and glossy newspaper, and both worked for me.

2. Fold it neatly into half, making sure the edges match perfectly.


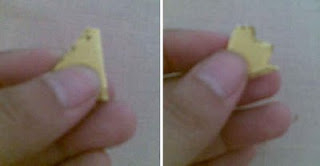
3. Fold it into further halves, twice over, so you are left with something that looks like this.


4. Now take a pair of scissors and snip off a tiny bit on the top. This will form the centre of the parasol or umbrella, from where we can slip in the straw.

5. Turn your scissors to the broad arc of the circle and cut out a jagged motif, so that when we open the folds, it forms a decorative pattern. You can be really creative here and create motifs as you like. Or use a pattern scissor to help.
6. Open the folds of your paper parasol and fit it right below the bend of the straw.


Go on, serve the drinks! What are you waiting for?? Oh, the compliments… they’ll come soon! :)


LinkWithin

Blog Widget by LinkWithin