Sunday, June 9, 2024
The Collab Story
Friday, September 10, 2021
Aceing the Distressed Look
This blog post is an attempt to take you through the process of giving wood the much-in-vogue distressed look. All it takes are a few coats of paint and some sanding, and voila!
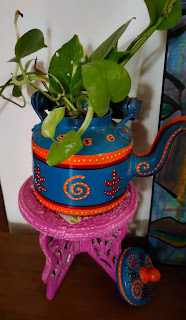
So let us start at the very beginning.... I wanted to paint an old wooden display table with the distressed look. Painting this old table would extend its life as well as revamp its value as a decor piece. This is how the table looked before I started.
First, I lightly sanded the raw wooden surface and added a coat of primer to it. Giving a base coat of primer is always a good idea as it helps smoothen the painting surface, and fills in all the small gaps in the wood. Let the primer dry out well, preferably overnight.
Next I got out my acrylic paints and got to the interesting part. Achieving the distressed look basically involves removing parts of the top coat of paint to reveal the inner layer. So you should always choose contrasting colours to bring out the distressed effect. I chose white as the base coat and a dark pink as the top coat.
As you apply the different colours one over the other, make sure that each coat dries out completely before you paint over it.
Lastly, rub lightly over the dried top coat with a smooth-grain sandpaper to bring out the base coat colour. Remember that the distressed look is not meant to be uniform; at some places the effect will show up more than others.
And TaDa! The distressed wooden table is ready for display.
If you would like to see a short video of the process described above, visit the Creative Rumblings YouTube channel. You can subscribe to my channel to view other process videos and take back loads of DIY ideas that are sustainable and environment-friendly.
Friday, April 2, 2021
The Tree Trunk Art Project
Another year, another public art project! So glad to be living in an area where we have some like-minded people who care to brighten up their immediate environs with street art. This time a dead tree trunk became our canvas.
But let me share the back story first. So a couple of full-grown trees were transplanted a year back. While one survived the change, the other one could not make it. It withered and started shedding its bark. That is when this project was conceived by another resident artist.
And voila! Over the Women's Day weekend in March, three of us got together to enliven the dead tree. With no plans in place, we started painting randomly.
But as the colours took over the tree trunk, it acquired a colourful new identity.
From the greens of the grass and leaves to the red, pink, white, and blue flowers that blossomed on the trunk, each gave it a new dimension.
Then came the butterflies, ladybirds, and a variety of birds.
Finally came the unconventional elements - a dog, a mask, even a frothy beer mug hidden amidst the folds of the tree trunk!
It was a new, fun experience to give life to a dead object of this size.
The best part was to be able to paint to our heart's content on such a large canvas.
It was, no doubt, somewhat tiring, as you can see from our weary faces in our project wrap-up picture. But despite everything, it was an immensely satisfying experience! 😅


