Showing posts with label cardboard. Show all posts

Sunday, November 28, 2021

The Lepidoptera Artist Book


This month I'd like to bring you my 'Moths and Butterflies' handmade journal, prepared from scratch by recycling common materials around the house. Click here to see a process video of how you can also make a junk journal or artist book of your own.


Pages from the Moths and Butterflies journal


In my artist book, I am trying to capture all the pretty Lepidoptera (species of insects) seen around the area I am located in. 


Close up of the hand-painted images

Being in the midst of green open spaces, we are lucky to have a wide variety of beautiful insects not commonly seen in urban settings. There is a wide range of butterflies, right from the tiny grass ones to large beautiful swallowtails and tigers. The moths here are also larger and include hawkmoths, strikingly colourful and positively exotic.

Given the way climate change is creeping upon us, I'd like to capture the beauty of these Lepidoptera for posterity so that future generations aren't deprived of the pleasure of knowing about them.


Friday, January 8, 2021

Mixed Media Outings


Happy 2021, dear readers! Hope you all had a wonderful start to the new year, and here's wishing you all a healthy year ahead.


Like every other year, my output has been impacted by the season. And my postings have dwindled since last month. I'm taking things slow, catching up on my reading, baking, and other random pursuits.


Meanwhile, here's bringing you a compilation of some mixed media pieces done over the last couple of months.

These were all previously published on my Instagram account. (Follow, follow.... don't wait till tomorrow.)


Most of these pieces are part of a junk journal that I'm currently working on, while the one below was inspired by a picture posted by a friend.

Hopefully I will pick up the pace in this new year, and will soon share more pending projects that I complete later this month.


Friday, July 24, 2020

Mixed Media Squares


For today's post, we need to go back in time a bit. Let us revisit these previous posts of mine from February 2016 - Faces and Figures, and The Making of a Flower Girl. For a recap, those artworks were made in mixed media using a variety of techniques like stamping, collaging, and finally some intuitive mark making. 

I landed up making quite a few of these 10"x10" mixed media squares, and tucked them away in some corner of my supplies cupboard. Some personal upheavals later that year made me forget about these completely, and I did not post about them here. Till we moved houses and cities last year and I recently rediscovered them while searching for something else. 


Lined up together they looked so pretty that I decided to dedicate a much-deserved post to them finally. So I will not go into the details of the process (for that you can see the previous posts from February 2016), but let you feast your eyes.


Can you identify this singer? My hubby's favourite!


I simply love this cat portrait.


Here is another view of the ladies. They definitely brightened up our lockdown days. Hope you enjoy them as much as I do.


Friday, February 7, 2020

Valentine Heart Inchies


Since February is the month of love, I had to post a Valentine special!

So here's a glimpse of the challenge I set up.... To fill up an entire page with little heart inchies, thinking up myriad ways of representation using the ❤️ symbol. Now if that doesn't spell love!


I had a whole lot of fun doing this challenge, and got ideas from the kiddos to help me along. The aim is not to repeat patterns or colour schemes. Go on, try it out yourself with your Valentine and loved ones.


Thursday, January 19, 2017

Gratitude Postcards


Just about 3 weeks into the new year and I am trying to get things back on track in my world. I'm no spring chicken - having spent enough years going round the sun, I can safely say that 2016 has decidedly been the worst year of my life thus far, with so much going wrong on so many fronts. But then the only way to move forward from all that drags one down is to count one's blessings. So I just have to be grateful for all the things that did go right in the midst of all that chaos last year.


Hence this first post of the new year is dedicated to sharing with you the gratitude cards that I made while trying to recover from loss and pain. They were simply my way of adopting a grateful attitude, of showing thankfulness and gratitude for the life that I live.


As things stand now, a lot of things have changed around me. How that pans out and impacts my creative self and my output is something that will show as we traverse through 2017. Here's hoping that the changes in my personal sphere only serve to act as a springboard to greater heights in the creative realm. Signing off on that optimistic note....

Here is something you may want to follow this year:


Wishing all my readers a wonderfully creative 2017 again....


Wednesday, August 27, 2014

Collaging Capers


Playing around with papers, that is what I mean by collaging capers! :) Yes, paper collaging has been something I used to enjoy doing even as a college kid and suddenly the love seems to have resurfaced.

So an old half-finished painting that lay unwanted in a corner of my art supplies cupboard got a new lease of life last month as I gave it a collage makeover. The half-painted version looked uninteresting and drab; must say the papers added quite a bit of verve to the piece. I finished it with a glossy coat.


The process of first selecting the right papers, matching the shades, tearing up the papers to the right size, and finally putting them on is definitely tedious.... but I find it almost meditative. It gives me the opportunity to put my patience to test, almost willing myself to push my limits and learn to stay calm. Maybe I should try collaging on larger pieces now....

Thursday, February 28, 2013

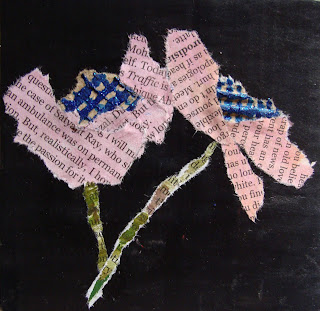
Paper Poppies


Playing around with bits of paper - and that includes newsprint, cardboard, bread backings, and what have you! The poppies in our garden are full of buds, and I can't wait for them to burst into blooms. Till then, let us be happy with this version. :)


Try making some yourself - stain your papers with watered-down poster/tempera/acrylic colours and let loose your imagination.... some magic is sure to unfold!


Monday, January 17, 2011

Time For Something New

New year, new styles.... so I tried out this impressionistic landscape representation.


Inspired partly by imagination, and mostly by the lovely work of Jennifer Woodburn, a Canadian artist I discovered sometime last year. I love how she packs in so much detail in such a simplified format. And her finding inspiration from her everyday surroundings.

Someday I hope to be able to do the same.... Amen!

Thursday, August 19, 2010

Yellow Lily

Perfect antidote for a grey, misty day: a bright yellow lily, now blooming in my dining area. :)

Had to paint something cheerful to dispel the dreariness of a day-long drizzle. This yellow lily made for just the right subject. I'm back to acrylics and pen, my comfort zone. A quick swish on card stock, and I have something new to smile about!

Saturday, December 12, 2009

The Nasturtium, Again!

Remember how the first post for this blog featured my favourite flower, the nasturtium. Well, that was a computer painting (created in MS-Paint) and this is an actual one.

Done with acrylic on corrugated cardboard. Quick and satisfying! :)

Wednesday, October 28, 2009

Floral Outings


Check out my floral outings this week. I painted these flowers on corrugated fiberboard pieces with acrylics, using pen outlines.


The first picture is of a flower that is currently blooming in my garden. The second picture was inspired by a photograph I came across while browsing.


Pity the camera didn't capture the shades of mauve too well. However good your camera may be (and mine is a high-res Sony), sometimes the naked eye works best! :)

Saturday, September 12, 2009

The Vanishing Trick


I never seem to be able to keep my word, do I? I make promises of showing you all my new creative projects and then disappear! Well, some of the reasons of my disappearance are given right here.

As for what I've been upto, I'll leave you with this teaser of an unfinished project for the kids. Hope to complete it over this weekend.


And yes, I just finished another painting, this time using my kids' poster paints. :) You'll get a peep into that too... very soon.... promise!!!

Tuesday, June 2, 2009

How To Make A Birdhouse

As I shared with you in my last post, I recently created a paper-mache birdhouse for putting up in our new house. Here I take you through the paces.


Just follow the steps below to create your own birdhouse using cardboard and paper.

  1. Take a cardboard box; candy boxes do just fine for this. Just make sure the basic shape resembles the shape of a birdhouse. In my case the box was almost square with curved sides.

  2. Fold the top flaps and join them to add a roof to the box. You can also build a roof by sticking extra cardboard pieces on the top using scotch tape or glue.

  3. Now cut a round hole in between the front side; this is where the bird pops its head out from!

  4. Cut a long, rectangle piece of cardboard and tape it right below the hole you just cut. This forms the perch for the bird.

  5. If you want to hang your birdhouse, add a loop of string at the back. I wanted mine propped up from a pot, so I cut out a small hole at the bottom. I’ll later insert a stick into it and push the other end into my pot.

  6. Now tear paper pieces and paste them all over the birdhouse, covering all the areas evenly. Add multiple coats if required.


  7. Paint your birdhouse in attractive colors. I painted mine in shades of cream and brown. So I call my creation the Butterscotch Birdhouse!
I hope to have some more of these beauties around the house in the coming days. :) Will share the progress with you, as always.

Tuesday, July 8, 2008

Tin-Tin!

Apart from reminding you of a popular comic book character, that title refers to the tin sheets that cover a whole lot of packaged tinned food containers. You know, the types that you cut out with a pair of scissors before you actually get to empty the contents of the tin can.

So what can you do with a sheet of tin that you ripped off some container? (considering this is a creative blog!)…. Pretty much, if you ask me. Just see what I did – backed it up with some cardboard and paper, and had a homemade coaster for the table.


Dressed it up with some scribbles and it can pass off as a wall piece! Yippee...


I am sure the story hasn’t ended yet… I can feel another makeover for the tin is on its way already. Look out for more…

And in the meanwhile, have fun recycling. It really is one of my favourite-est pastimes (though it is a different matter that I have no time with a full-day job, two kids, and a new house making constant demands on my sanity!)….

LinkWithin

Blog Widget by LinkWithin